If you want to make your own Android app, you’re in luck. Creating Android apps can be a fun and rewarding experience. However, before you can start making apps, there are a few things you need to know.
In this guide, we’ll show you how to get started making Android apps. We’ll cover the basics of Android app development, including how to set up your development environment, how to create a basic app, and how to publish your app on the Google Play Store.
By the end of this guide, you’ll have everything you need to start making your own Android apps. So let’s get started!
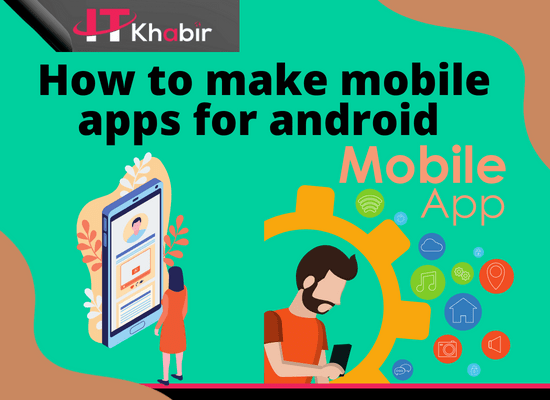
How to make mobile apps for android?
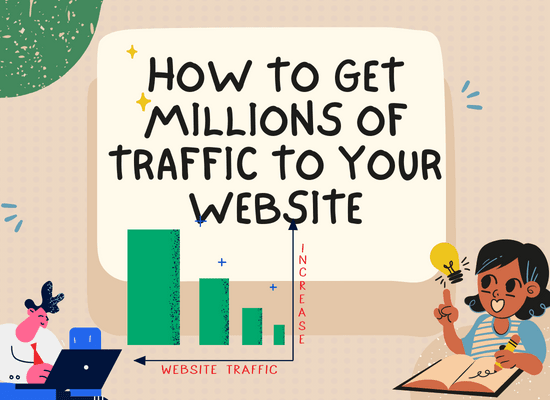
How to Make Mobile Apps for Android in 15 Steps
Android devices are everywhere. According to Statista, there are over 2.5 billion active Android devices. That’s a lot of people using Android devices!


With so many people using Android devices, it’s no wonder that many businesses are looking to develop Android apps. Android apps can help businesses increase their reach, connect with customers, and boost sales.
If you’re looking to develop an Android app for your business, you’re in the right place. In this article, we’ll show you how to make mobile apps for Android in 15 steps.
1. Choose Your App Idea
The first step in developing an Android app is to choose your app idea. What do you want your app to do? What problem do you want to solve?
Think about the needs of your customers or target market. What would they find useful? What would make their lives easier?
Once you have an idea of the app you want to develop, you can move on to the next step.
2. Do Your Research
Before you start development, it’s important to do your research. This research will help you validate your app idea and ensure that there’s a market for your app.
Start by searching the Google Play Store for similar apps. What do these apps do? How are they designed? What features do they have?
You can also search for articles, blog posts, and forum discussions about your app idea. What are people saying about it? Is there a demand for this type of app?
3. Create a prototype
Once you’ve done your research, it’s time to create a prototype of your app. This prototype will help you visualize your app and understand how it will work.
There are a few different ways to create a prototype. You can use a tool like Adobe XD or Figma, or you can create a physical prototype using paper and pencil.
Whichever method you choose, make sure your prototype includes all the important screens and features of your app.
4. Choose the right tools
Now that you have a prototype of your app, it’s time to choose the right tools for development.
There are a few different ways to develop Android apps. You can use a platform like Appy Pie or BuildFire, or you can develop your app using Android Studio.
If you’re just starting out, we recommend using a platform like Appy Pie or BuildFire. These platforms make it easy to develop and launch your app without any coding knowledge.
5. Find the right team
If you don’t have the time or resources to develop your app yourself, you’ll need to find a team to help you.
The size of your team will depend on the scope of your project. For a simple app, you may only need a developer and a designer. For a more complex app, you may need a team of developers, designers, and testers.
When choosing a team, it’s important to find people who are experienced in developing Android apps. You can find developers on freelancer websites like Upwork or Fiverr.
6. Create a development plan
Once you have your team in place, it’s time to create a development plan. This plan will help you organize and track your project.
Start by creating a list of all the features you want to include in your app. Then, prioritize these features based on importance.
Once you have a list of features, you can start creating user stories. User stories are a way to define the functionality of your app from the user’s perspective.
For each feature, you should create a user story that describes how the user will use that feature. For example, “As a user, I want to be able to login so that I can access my account.”
7. Design your app
Now that you have a list of features and user stories, it’s time to start designing your app.
The design of your app should be based on the needs of your users. What do they need to do? What tasks do they need to complete?
Your app should be designed to help users complete these tasks as easily and efficiently as possible.
When designing your app, keep in mind the principles of good design. Your app should be easy to use, visually appealing, and consistent.
8. Develop your app
Once you have a design for your app, it’s time to start development.
If you’re using a platform like Appy Pie or BuildFire, development will be done for you. All you need to do is provide the content for your app (text, images, etc.).
If you’re using Android Studio, you’ll need to develop your app yourself or hire a developer to do it for you.
9. Test your app
After your app is developed, it’s important to test it to make sure it’s working properly.
There are a few different ways to test your app. You can use a tool like TestFlight or App Center, or you can test your app manually.
If you’re testing your app manually, you’ll need to install it on a device and test it yourself. Make sure to test all the features of your app and look for any bugs.
10. Launch your app
Once your app is tested and ready to go, it’s time to launch it on the Google Play Store.
Before you launch your app, you’ll need to create a Google Play Developer account. This account will cost you $25.
Once you have a Google Play Developer account, you can upload your app to the Google Play Store. Make sure to include a promotional video, screenshots, and a detailed description of your app.
11. Promote your app
Just because your app is on the Google Play Store doesn’t mean people will find it. You need to promote your app to get it in front of potential users.
There are a few different ways to promote your app. You can use paid advertising, social media, or PR.
Paid advertising is the most effective way to promote your app. You can use Google AdWords or Facebook Ads to get your app in front of potential users.
12. Analyze your app
Once your app is launched, it’s important to track your app’s performance and analyze the data.
There are a few different ways to track your app’s performance. You can use Google Analytics or Flurry.
Google Analytics will show you how many people are using your app and what they’re doing in your app. Flurry will show you how your app is being used and how people are interacting with it.
13. Update your app
As you get more data about how people are using your app, you may need to make some changes or add new features.
It’s important to regularly update your app to keep users engaged. You can use the data you’ve collected to decide what changes or additions to make.
14. Monetize your app
If you want to make money from your app, you’ll need to monetize it. There are a few different ways to monetize an app.
You can charge users to download your app, sell in-app purchases, or show ads.
Which monetization method you choose will depend on your app and your target market. You’ll need to experiment to find the best way to monetize your app.
15. Keep your app updated
Even after you’ve launched your app, the work isn’t over. You need to keep your app updated with the latest features and security patches.
If you don’t keep your app updated, users will quickly lose interest and delete your app. To keep users engaged, you need to regularly update your app.
Conclusion
Developing an Android app can be a great way to reach new customers and boost sales. If you’re looking to develop an Android app, follow the steps in this article.
First, choose your app idea and do your research. Then, create a prototype and choose the right tools for development. Find the right team and create a development plan.
After you’ve designed and developed your app, it’s time to test and launch it. Promote your app and use data to analyze your app’s performance. Update your app regularly and monetize it to make money.
How to make mobile apps for android free?
Assuming you would like an article discussing how to make mobile apps for android without spending any money:
If you have an idea for a great app, you may be wondering how you can get it made without spending a lot of money. The good news is that there are a few ways to create mobile apps for android without breaking the bank.
One option is to use a drag-and-drop app builder. These platforms allow you to create a basic app without any coding knowledge. While you won’t have as much control over the final product, you can still create a functional and appealing app without spending a lot of money.
Another option is to hire a freelancer to build your app. This can be a more affordable option than working with a development studio, and you’ll still have a lot of control over the final product. However, it’s important to make sure you find a reputable and reliable freelancer who can deliver the app you want.
Finally, you can also consider building the app yourself. If you’re willing to put in the time and effort, you can learn how to code and create your own app. This option will take the longest and require the most work, but it can be very rewarding.
No matter which route you decide to take, you can create a mobile app for android without spending a lot of money. With a little research and planning, you can have a great app up and running in no time.
How to make mobile app with visual studio?
When it comes to making mobile apps, Visual Studio is a powerful tool that can save you a lot of time and effort. With Visual Studio, you can create apps for Android, iOS, and Windows Phone. In this article, we’ll show you how to create a simple app for Android using Visual Studio.
Creating an Android App in Visual Studio
To get started, launch Visual Studio and create a new project. Select “Templates” > “Visual C#” > “Cross-Platform” > “Blank App (Android).” You can also use one of the many other templates available for creating Android apps.
Next, you’ll be asked to select the minimum API level for your app. The API level is the version of the Android operating system that your app will run on. For this example, we’ll select API level 19, which is Android 4.4.
Once the project has been created, you’ll see a number of files and folders in the Solution Explorer. The file that we’ll be working with most is MainActivity.cs. This is the main activity file, and it contains the code that will run when your app is launched.
Next, let’s take a look at the code in MainActivity.cs. The first thing you’ll see is the OnCreate method. This is the method that is called when the activity is first created. In this method, we can set up the UI for our app.
Let’s start by adding a TextView to the activity. A TextView is a simple view that can display text. To add a TextView, find the OnCreate method in MainActivity.cs and add the following code:
TextView textView = new TextView(this);
textView.setText(“Hello, Android!”);
setContentView(textView);
This code will create a new TextView and set its text to “Hello, Android!”. The last line of code, setContentView(textView), tells Android to use the TextView as the content view for the activity.
Now that we’ve added a TextView, let’s run the app and see what it looks like. To do this, select “Debug” > “Start Without Debugging” from the menu. This will launch the app on your Android device or simulator.
If everything went well, you should see the text “Hello, Android!” on your screen. Congratulations, you’ve just created your first Android app!
In this article, we’ve just scratched the surface of what’s possible with Visual Studio for making Android apps. To learn more, be sure to check out the Visual Studio documentation.
How to develop a mobile application for android?
There are many ways to develop Android applications. The most common and recommended way is to use Android Studio, which is the official IDE for Android development. Android Studio is based on IntelliJ IDEA and offers a powerful code editor, a flexible build system, a wide range of tools, and a rich set of features.
If you’re new to Android Studio, start with the “Hello World” tutorial. This tutorial guides you through the process of creating a simple application using Android Studio.
Once you’re familiar with the basics of Android Studio, you can start exploring the other features it has to offer. For example, you can use the Layout Editor to design user interfaces, the Profiler tool to improve your app’s performance, and the Android Emulator to test your app on different devices.
There are also a number of third-party tools available for Android development. These tools can be used to supplement Android Studio or to replace it altogether.
No matter which tools you use, developing Android applications is a rewarding experience. With a little effort, you can create apps that are not only useful but also a joy to use.
How much do mobile apps make from ads
Ads are a necessary evil for many mobile app developers. They are the most common way to generate revenue from free apps, but they can also be a source of irritation for users.
When done poorly, ads can ruin the user experience and lead to uninstalls. When done well, ads can be a valuable way to monetize an app without compromising the user experience.
So, how much do mobile apps make from ads? It depends.
The amount of money that an app can generate from ads is directly related to the number of users and the level of engagement. A popular app with a large number of active users can generate a significant amount of revenue from ads, while a less popular app with fewer active users will generate less revenue.
The type of ads also plays a role in how much money an app can make. Interstitial ads, which are full-screen ads that appear between content, tend to generate more money than banner ads, which are smaller ads that appear at the top or bottom of the screen.
In general, apps that are able to generate a large number of impressions (the number of times an ad is seen) will generate more money from ads than apps with fewer impressions.
The eCPM (effective cost per thousand impressions) is a good metric to use to gauge how much money an app is making from ads. A higher eCPM means that the app is generating more revenue from ads.
So, how much do mobile apps make from ads? It depends on a number of factors, but a popular app with a large number of active users can generate a significant amount of revenue from ads.
How to make a mobile app for android and ios?
Assuming you want a cross platform app:
There are many ways to approach making a mobile app for both Android and iOS. One way is to use a cross-platform development tool like React Native or Flutter. These tools allow you to write your code once and deploy to both iOS and Android.
Another way is to use a platform-specific development tool like Xcode for iOS or Android Studio for Android. These tools allow you to write code specifically for each platform, but you can reuse some code between the two platforms.
No matter which approach you choose, there are some general steps you should follow:
1. Define your app’s purpose and features. What does it do and why would someone want to use it?
2. Choose a development approach. Will you use a cross-platform tool or platform-specific tools?
3. Choose a design approach. How will your app look and feel?
4. Write your code.
5. Test your app on real devices.
6. Deploy your app to app stores.

Final Thought
Overall, making mobile apps for Android is a fairly straightforward process. However, there are a few key considerations that need to be made in order to ensure a successful outcome. First and foremost, it is important to have a clear and concise idea of what the app is supposed to do. Once that is established, the next step is to determine which Android SDK is best suited for the task at hand. With that information in hand, the development process can begin in earnest. Finally, it is essential to test the app thoroughly before releasing it to the public. By following these simple steps, anyone can create a high-quality Android app.